

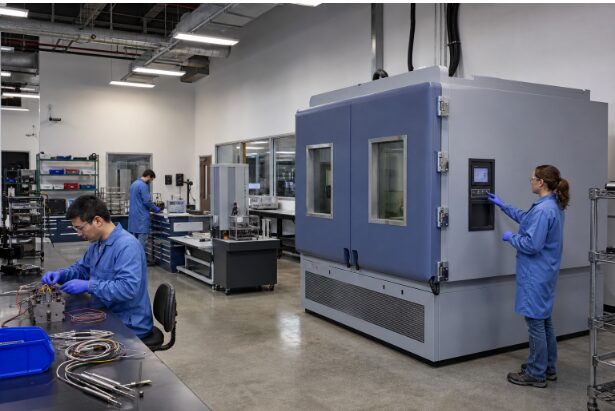
Tight laboratory deadlines can put pressure on every part of an environmental testing program, from selecting equipment to reviewing final data. When a project needs temperature, humidity, cycling, or conditioning work to be completed quickly, teams may need to find stock rental test chambers while also preparing the room, utilities, samples, fixtures, and documentation process. Speed is useful only when it supports a well-defined test plan. A chamber that arrives quickly will not resolve a delayed project if the samples do not fit, the correct power service is unavailable, the method is incomplete, or the team has not defined what constitutes a passing result.
Why Testing Deadlines Matter
Environmental testing often sits on the critical path for product launches, design releases, customer commitments, corrective actions, and qualification programs. A delay can affect more than the lab schedule. It can delay engineering decisions, delay production, or force a team to repeat work after an avoidable setup error. For example, a development team may receive a replacement test chamber on time but still lose a week because the room has insufficient electrical capacity, fixture cables are missing, and the acceptance criteria are not approved. Early planning prevents this kind of idle time and helps the team move from delivery to a controlled test run.
Define Test Goals First
Start with the test’s purpose, then select the equipment and schedule needed to execute it. This approach keeps the project focused on valid results rather than on the features of a particular chamber.
Document the essentials
- Identify the product, material, component, or assembled system being tested.
- State whether the work is screening, conditioning, qualification, life testing, failure analysis, or another activity.
- List the required temperature, humidity, ramp rate, dwell time, cycling profile, recovery period, and operating state.
- Define pass and fail criteria before loading the first sample.
- Estimate sample quantity, test duration, retest needs, and the time required for inspection.
A short screening exposure does not require the same setup as a multi-week stability study or a formal qualification program. The applicable test method, product specification, customer requirement, or internal procedure should determine the conditions.
Choose the Right Test Conditions
Temperature-only testing may be sufficient when moisture is not relevant to the product or failure mechanism. When humidity can affect corrosion, insulation resistance, materials, coatings, packaging, or biological samples, temperature and humidity control may be necessary. Review the full method, not just a summary chart, because details such as stabilization time, sample handling, measurement intervals, and allowable excursions can affect the setup. Extreme setpoints require additional planning. Low temperatures can create condensation during loading or unloading, while high temperatures can increase sample heat load and lengthen recovery time. Rapid transitions may also demand different equipment capabilities than steady-state exposure. Large-scale thermal vacuum testing illustrates the same basic principle: controlled conditions only provide useful evidence when the test article, operating profile, instrumentation, and procedure are planned together.
Check Equipment Fit Before Ordering
Before reserving, renting, or purchasing equipment, compare its verified capabilities with the actual test plan. Do not rely on exterior dimensions or a general capacity description alone.
- Interior workspace: Confirm that samples, fixtures, sensors, cables, and airflow clearance will all fit.
- Temperature and humidity range: Verify the complete required range, including conditions at the combination of temperature and humidity you need.
- Heat load: Account for powered electronics, batteries, motors, lights, and other items that release heat.
- Recovery: Consider how quickly the system must return to setpoint after opening the door or adding a sample.
- Access: Confirm that ports can accommodate probes, tubing, power leads, and data cables without compromising the test.
- Safety controls: Review alarms, interlocks, containment, and emergency shutdown options for the sample hazards involved.
Plan Lab Space and Utilities
Delivery is only one milestone. The equipment must also reach its final location and operate safely there. Measure doorways, elevators, corridors, bench space, and the intended installation area before finalizing the schedule. Confirm floor loading, clearance for service access, and room ventilation. Utilities deserve the same attention. Verify voltage, phase, current draw, grounding, circuit capacity, heat rejection, water supply, drainage, and exhaust requirements where applicable. Reserve space for sample preparation, computers, independent sensors, and safe movement around an active test.
Protect Samples, Staff, and Data
Fast testing still requires a written safety review. Identify foreseeable events such as overheating, leakage, rupture, ignition, fumes, pressure release, or unexpected sample movement. Establish loading and unloading rules, emergency response steps, inspection intervals, and the authority to change setpoints or stop a run. Use protections appropriate to the specific risk, including alarms, independent sensors, interlocks, containment, controlled access, ventilation, and personal protective equipment. Safety requirements vary by sample, facility, test method, and local regulations, so no single chamber rating or workflow is suitable for every application.
Verify Performance Before Testing
Perform a short readiness review before beginning the formal test. Inspect for shipping damage, missing parts, damaged seals, and incorrect connections. Confirm that the controller, alarms, sensors, access ports, and data logging functions operate as intended. Allow the chamber to stabilize at normal operating conditions, then run a dummy load when practical. Review calibration records and measurement uncertainty requirements. Reliable results depend on a documented measurement process, not simply on a calibrated instrument. The principles of metrological traceability reinforce the need to connect reported measurements to documented references through an appropriate calibration chain.
Build a Clear Documentation Process
Good records reduce confusion when deadlines are tight. Record the test method, sample identification, operator, equipment identification, setpoints, start and stop times, observations, and pass or fail outcome. Save controller data and independent monitoring data when the method or risk assessment requires both. Also record door openings, alarms, power interruptions, setpoint adjustments, maintenance events, and unusual sample behavior. Use consistent file names, revision control, secure storage, and a defined review process. Automated logs and remote access are valuable tools, but a qualified reviewer should still evaluate the data before results are released.
Avoid Common Causes of Delay
A brief planning meeting with engineering, quality, facilities, safety, and test personnel can uncover problems before they become expensive. Watch for these common issues:
- Incomplete test requirements or undefined pass and fail criteria.
- Incorrect sample dimensions, weights, or heat-load assumptions.
- Missing fixtures, sensors, cables, adapters, or monitoring equipment.
- Unavailable electrical service, drainage, ventilation, or floor space.
- Unclear safety ownership or emergency procedures.
- Expired calibration records or no plan for performance verification.
- No assigned process for data storage, review, and approval.
-
Assuming delivery time is the same as ready-to-test time.
A Practical Pre-Test Checklist
- Test purpose and applicable method are approved.
- Temperature, humidity, cycle, dwell, and recovery targets are documented.
- Sample dimensions, mass, operating state, and heat load are confirmed.
- Equipment capacity and access-port needs are reviewed.
- Room, delivery path, utilities, ventilation, and clearance checks are complete.
- Safety review, fixtures, sensors, and emergency procedures are ready.
- Calibration, verification, data storage, and result-review responsibilities are assigned.
- A contingency plan exists for alarms, outages, equipment faults, or failed samples.
Conclusion
Tight deadlines do not justify skipping preparation. The most efficient environmental testing programs match the test method, equipment, facility, safety controls, and documentation process before the first sample enters the chamber. With early coordination and a practical readiness checklist, laboratories can reduce avoidable delays while preserving data quality and protecting staff. Teams should confirm sample requirements, sensor placement, calibration status, chamber capacity, power needs, ventilation, emergency procedures, and data-recording methods before testing begins. Clear responsibilities also help prevent confusion when equipment alarms, sample failures, or unexpected interruptions occur. A short readiness review can identify problems while they are still easy to fix, helping laboratories keep schedules on track without compromising reliable results. Good preparation ultimately makes environmental testing faster, safer, and easier to repeat.











1 thought on “How To Plan Environmental Testing When Lab Deadlines Are Tight”
Comments are closed.