

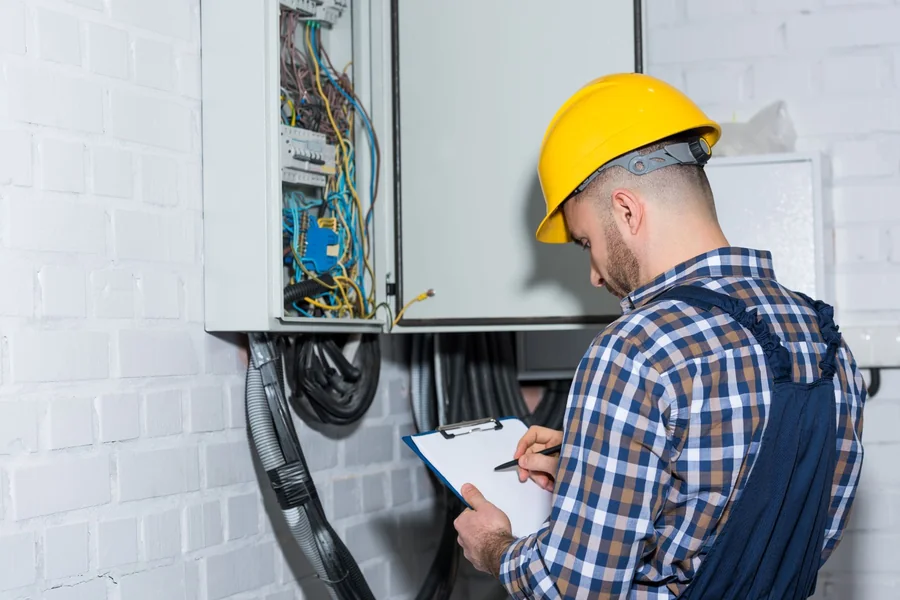
Many Philadelphia homes were wired long before modern appliances, EV chargers, and home offices became common. Layers of updates over the years can leave a house with a small fuse box, a crowded 100-amp panel, two-prong outlets, or a mix of wiring methods hidden behind plaster-and-lath. If you are considering a panel upgrade and targeted rewiring rather than a full gut renovation, the best results come from a clear sequence: confirm service capacity, prioritize the highest risks, choose low-impact access routes, and time inspections to minimize downtime. The following plan focuses on practical steps and trade-offs that fit rowhouses and prewar single-family homes across the city.
1. Check service capacity and service-entrance constraints first
Before adding new circuits, verify the service size and the condition of the service entrance. A load calculation will show whether a 60-amp or older 100-amp setup can support a new induction range, heat-pump system, or Level 2 EV charger. The meter socket, service mast or conduit, weather head, and main breaker all affect what is possible. If you are not sure where to start, work with a pro who provides licensed electrical service in the Philadelphia area so the upgrade matches local utility and permit requirements.
Where the panel sits matters, too. Tight basements, stone foundations, or a stair landing may limit clearances around the load center. If the panel has no space left, decide between a full-service upgrade to a 200-amp panel and adding a properly sized subpanel. The trade-off is upfront cost versus long-term headroom for future circuits. In some homes, relocating the panel a few feet to achieve working clearances solves congestion without tearing open finished rooms.
2.Triage the riskiest circuits: ungrounded outlets, knob-and-tube, and aluminum
Start by finding and correcting conditions that present a higher risk. Two-prong receptacles indicate ungrounded branch circuits. Simply swapping them for three-prong outlets without a grounding conductor is a common mistake. A code-compliant path is to install GFCI protection on that circuit and apply the “No Equipment Ground” labels, or, where feasible, run a new grounding conductor or a new NM-B cable. Kitchens, bathrooms, laundry, and exterior outlets should have GFCI protection, while bedrooms and living areas often benefit from AFCI or dual-function GFCI/AFCI breakers.
Knob-and-tube wiring can be serviceable when undisturbed, but splices buried in insulation or added loads near porcelain knobs are red flags. Aluminum branch circuits from the mid-century era require copper-to-aluminum-rated connectors and an antioxidant compound, not ordinary wire nuts. Mixed-metal splices, when done incorrectly, overheat and loosen over time. Multi-wire branch circuits (shared neutrals) must terminate on handle-tied or two-pole breakers to prevent neutral overload. Addressing these specifics first improves safety before you add capacity for new appliances.
3.Choose access methods that respect plaster-and-lath walls
Older homes often have finished masonry or plaster everywhere, so plan cable routes that avoid demolition. Fishing NM-B from the basement joists up interior stud bays and using “old work” boxes can add outlets with only small, repairable cutouts. In tight ceiling cavities, a pancake box may be the right solution for a light where full-depth boxes will not fit. When many runs must stay exposed, EMT conduit in a utility area or along the basement ceiling is durable and tidy. Each method has a cost-versus-disruption trade-off: fishing cable hides the work but can take longer, while surface conduit is faster but visible.
Consider example scenarios: A kitchen upgrade requires at least two 20-amp small-appliance circuits with GFCI protection, plus a dedicated circuit for a dishwasher or microwave drawer. In a finished rowhouse, you might fish new 12-gauge cable through a pantry wall, then run EMT above the basement ceiling for a clean path back to the panel. For a second-floor office, fishing to the stud bay under a window often works, but avoid overfilling shallow boxes and confirm box fill counts match the number of conductors and device size.
4.Time the permits, inspections, and utility coordination
Sequencing reduces downtime. Many jurisdictions require a permit for service upgrades and new circuits, with a rough inspection before walls are closed and a final inspection when devices are installed and the panel is labeled. If the service drop or meter needs work, coordinate a utility disconnect and reconnect so the main bonding jumper, grounding electrode conductors, and meter socket are inspected while the system is safely de-energized. Plan these steps early, especially if an exterior scaffold or a narrow alley limits access to the service mast.
Outage planning is practical, not just bureaucratic. For example, if you are installing a 200-amp panel and a whole-home surge protective device (SPD), schedule the changeover for midday so lights are back on before evening. Keep a few battery-powered work lights ready, unplug sensitive electronics while circuits are moving, and protect floors where plaster dust may fall. Home offices and refrigerators often need temporary extension circuits run from an unaffected area; a licensed electrician can set these up without overloading cords or receptacles.
5.After the upgrade: labeling, surge protection, and routine checks
A clear, accurate directory on the panel saves time later and helps first responders. Label each circuit with the actual room and major load, not just a number. If you used dual-function breakers, note which circuits have AFCI and GFCI protection at the panel versus at receptacles. A Type 2 SPD at the load center helps protect electronics from transient surges, while point-of-use protectors can add an additional layer of protection for computers and entertainment systems.
Once the dust settles, test GFCI and AFCI devices monthly using their buttons, and leave 36 inches of clear space in front of the panel. Warm switch plates, flickering on a specific circuit, or repeated trips are signals to call a professional for evaluation rather than tightening lugs yourself inside a live panel. Keep photos of key junctions and concealed routes for future projects. If you are considering solar, an induction range, or an EV charger next year, reserve spaces in the panel now so you are not forced into hasty changes later.
Older Philadelphia homes reward careful electrical planning. Verifying service capacity up front, addressing ungrounded or outdated wiring first, choosing low-impact cable routes, and timing inspections will keep the work safe and focused. With the right sequence, you can add the kitchen circuits that modern appliances need, provide arc-fault protection for bedrooms, and leave room in the panel for an EV charger when the time comes, all without unnecessary demolition. A licensed electrician who knows how rowhouses are built can help you balance scope, cost, and disruption to fit real life.








1 thought on “Planning a Safe Panel Upgrade and Partial Rewire in Older Philadelphia Homes”
Comments are closed.